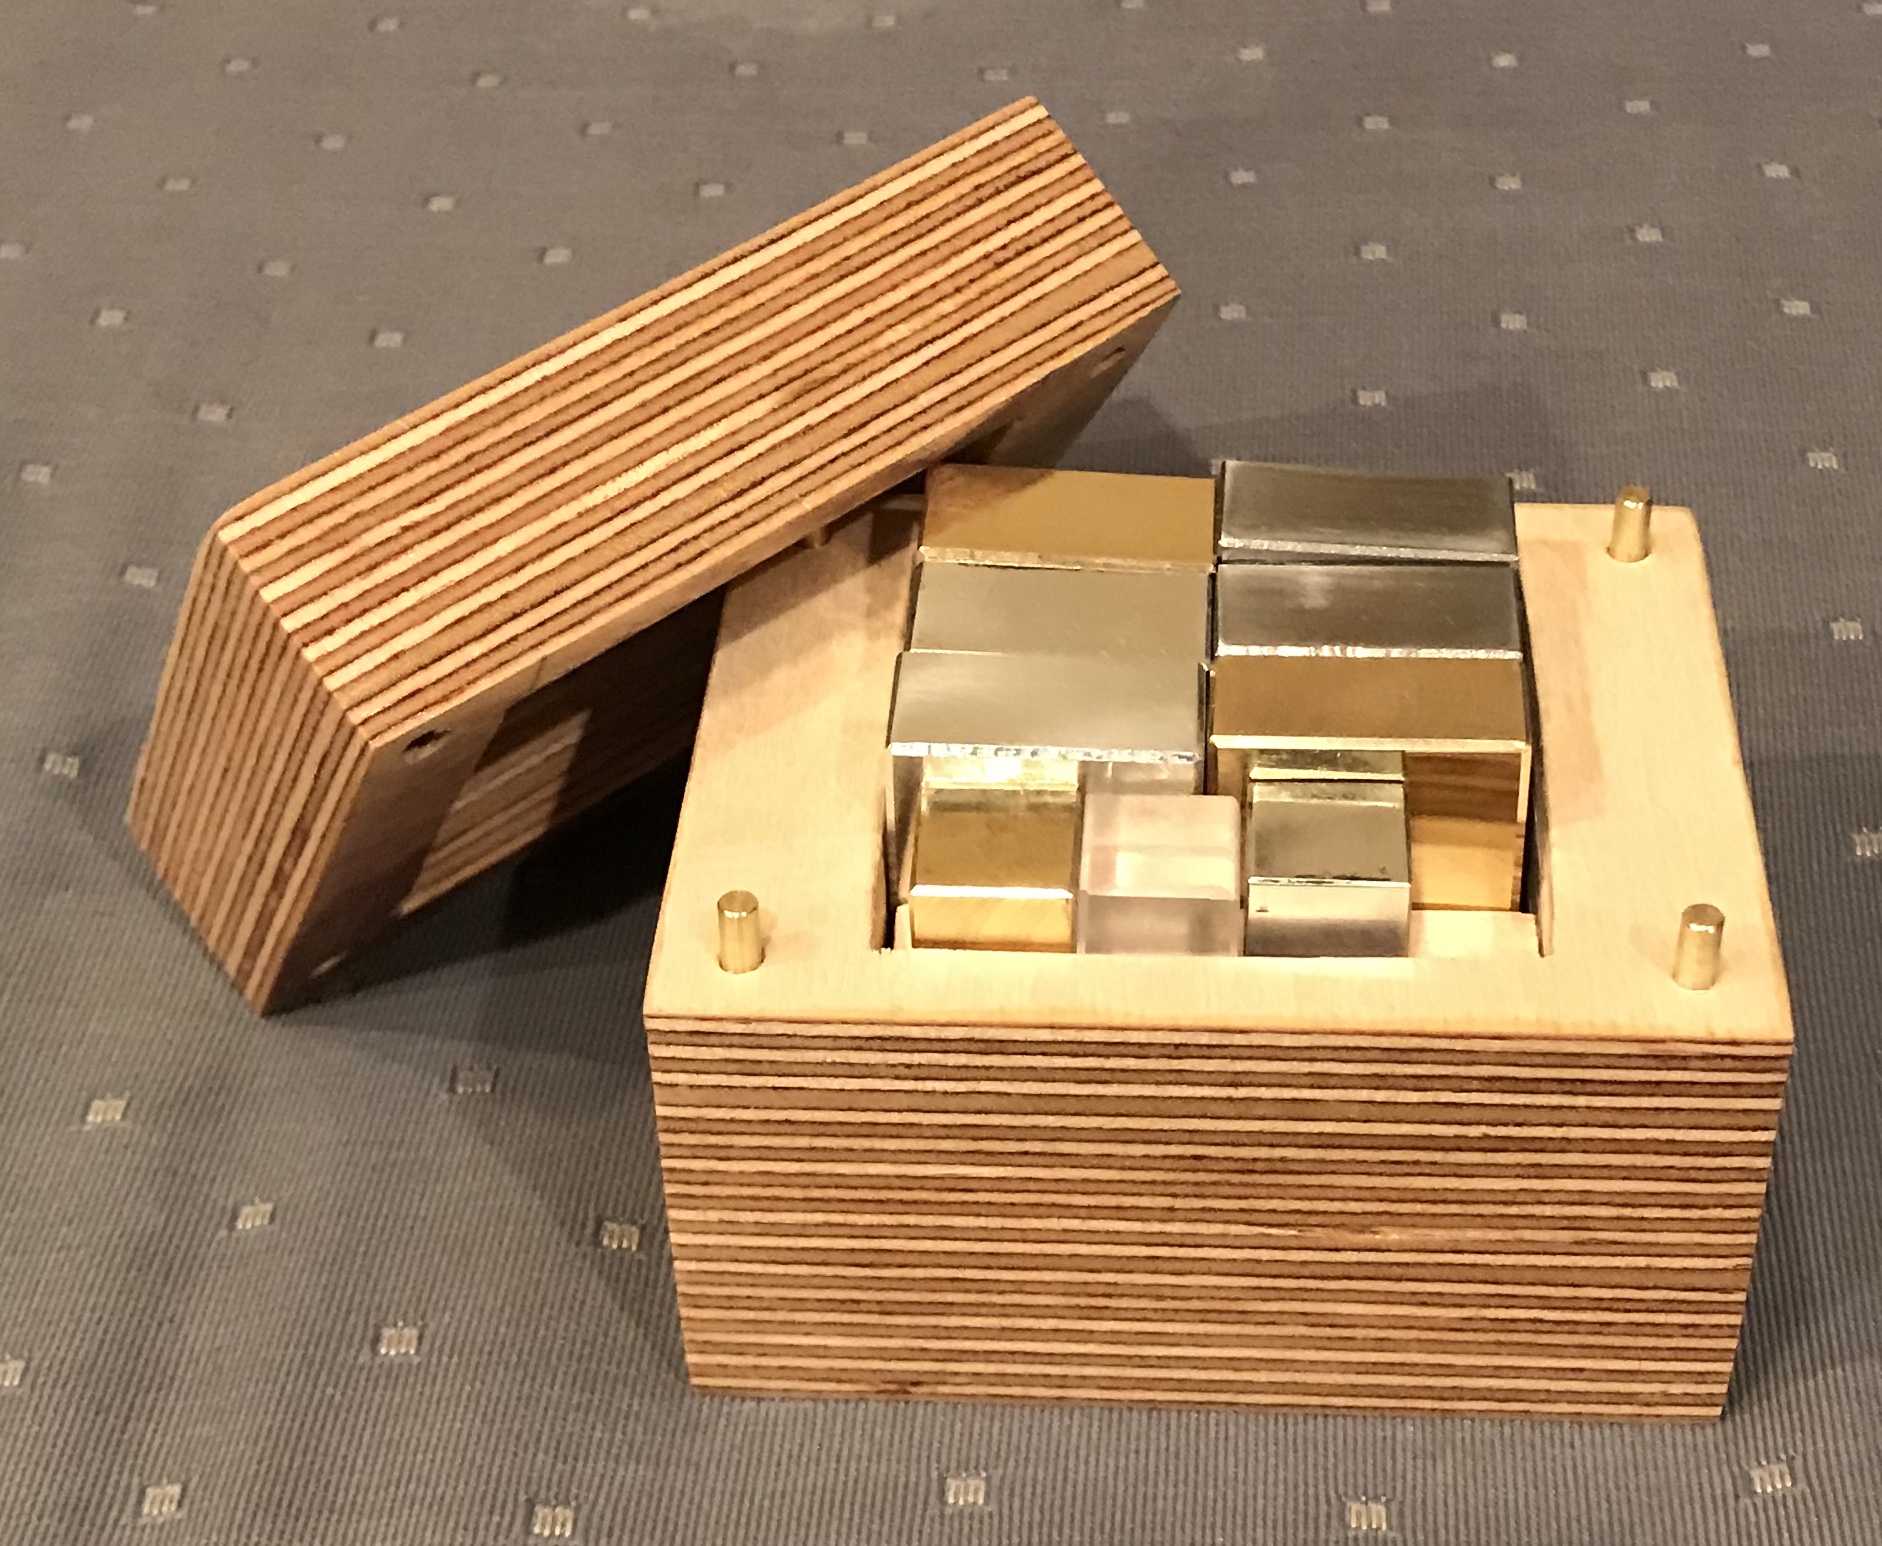
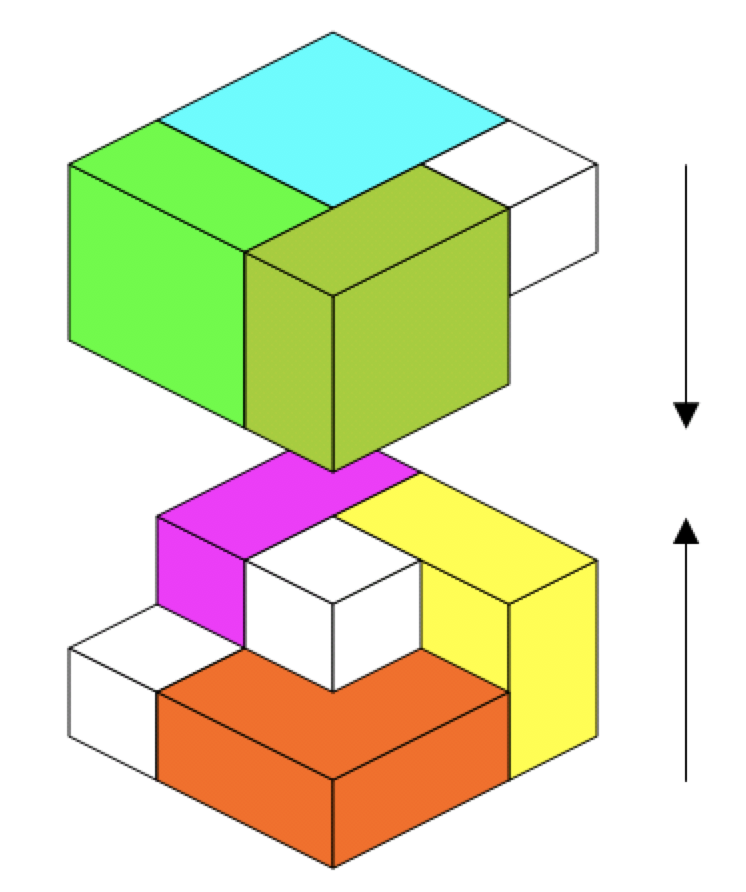
This puzzle came from the Futility Closet blog on the internet. It is simple to construct: made of six 1/2" X 1" X 1" blocks and three 1/2" cubes. The solution can easily be guessed in advance, if a little math is used. Each face or layer has nine 1/2" X 1/2" X 1/2" boxes, so a 1/2" cube (white in the picture below) is required in each layer (top to bottom, left to right, & back to front).
The puzzle will be made from brass, aluminum, steel and plastic. Six 1/2" X 1" X 1" sections will be made from brass (2), aluminum (2), and steel (2). Three 1/2" cubes will be made from brass, aluminum and plastic. A length of 1/2" X 1" steel bar stock had two 1" lengths cut off with the hacksaw as did a similarly sized length of brass. Two 1/2" X 1" X 1" scraps of aluminum were discovered in the scrap bin. A 1/2" length of 1/2" X 1/2" plastic was cut off as was a 1/2" length of aluminum: both from scrap. The best brass scrap found was a stub of 3/4" brass hex. This was cut off at 1/2" to make the brass cube.
With the rough cuts completed in the 32° garage, the project moved to the basement to clean up all sides of the 9 parts to dimension (±0.010"). The brass 1/2" cube was started first. The initial piece of rough cut hex was held in the milling table vise and the two insert cutter was used to square up the ends and reduce the width to 1/2". It was then placed in the vise with a square to align one side leaving a corner at the top. This corner was cut down until a slightly greater than 1/2" rectangle was left on this top surface. The part was flipped over and the process was repeated on the opposite corner. The second side was cut until the width was 1/2". The remaining two flat sides of the original hex were cut until they were separated by 1/2", producing the 1/2" brass cube.
The second part tackled was one of the brass lengths. Two ends were rough cut from the hacksaw. These were cleaned up and the length between them was reduced to 1". This was repeated on the other brass square, the two steel squares and the aluminum squares. The aluminum was unfortunately 5/8" thick and this had to be reduced to 1/2" prior to shortening the length. The steel gave trouble with both the two flute cutter and an end mill, so a fly cutter was used in 0.005" increments. The plastic cut easily with an end mill.
Chamfers were cut on all edges of all parts about 15-20 thou deep. The steel once again proved troublesome so chamfers were made with a file. The file was also used to put chamfers on the three cubes.
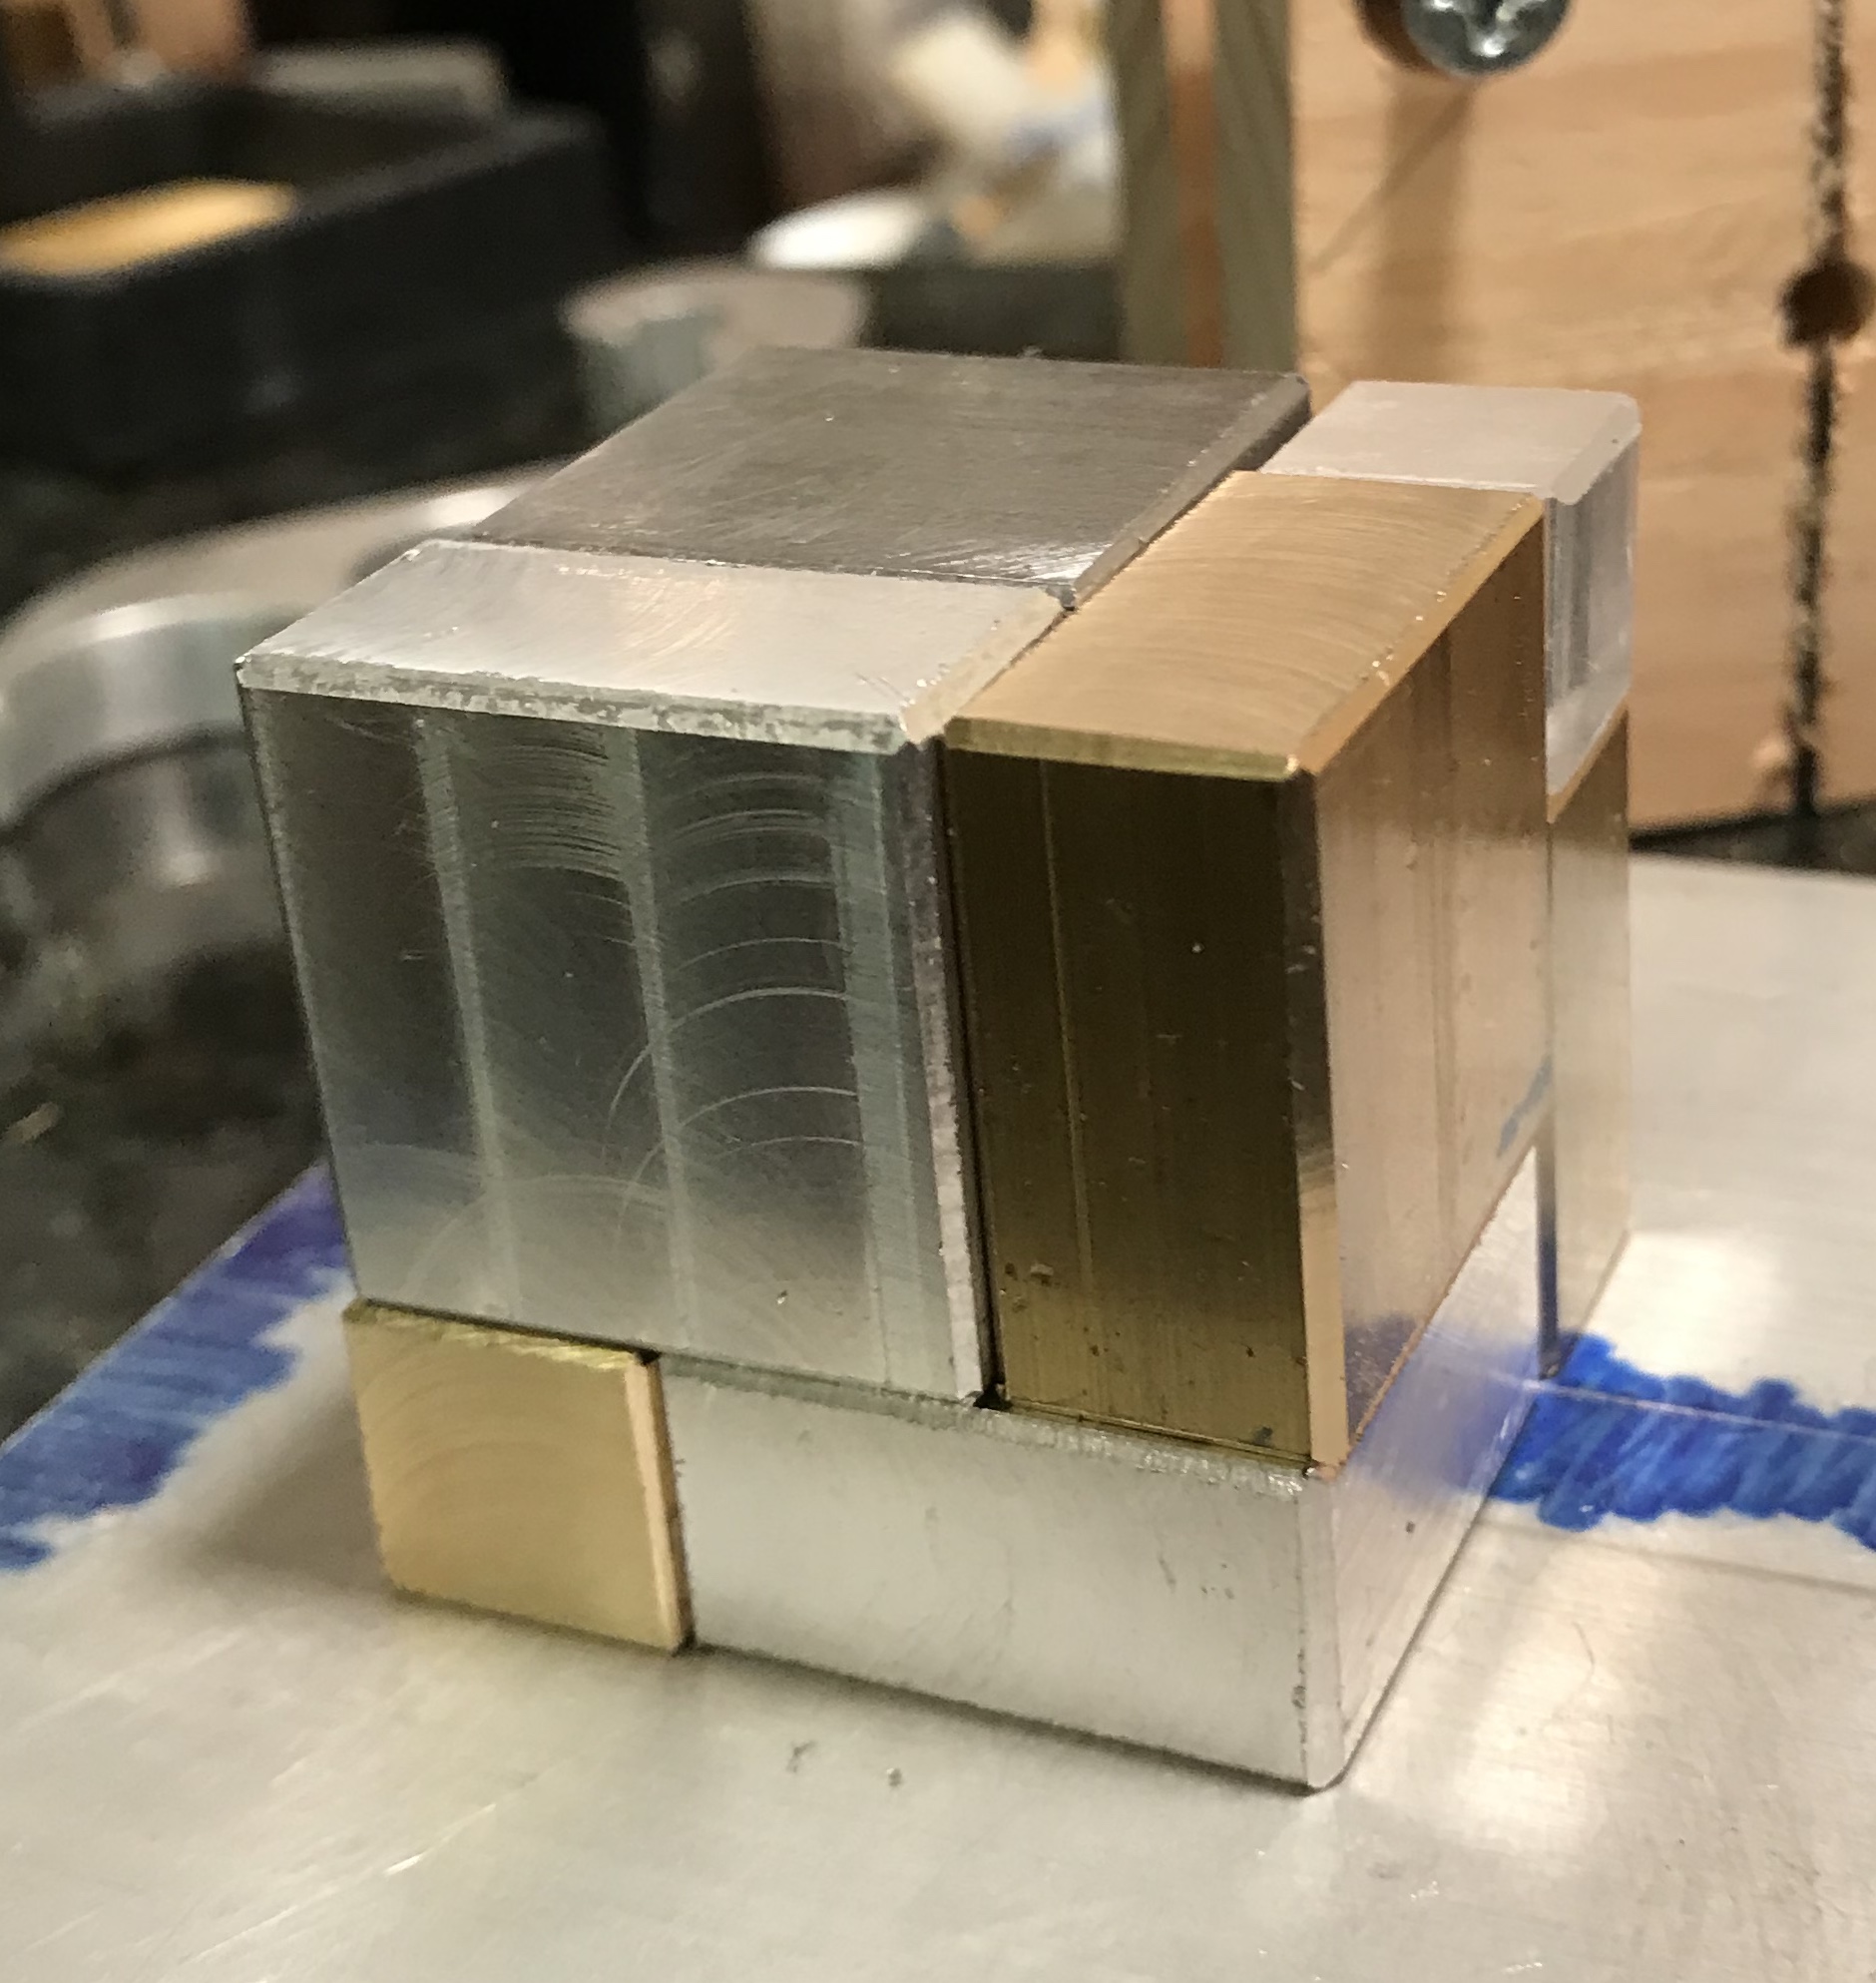
The parts were shined up. The brass and aluminum parts were lightly sanded and buffed with wheels, red for brass and white for aluminum. The steel parts were sanded 100 to 1500 grit. The acrylic was sanded with 1500 grit paper giving almost transparent faces. Some machining marks were left on for "color".

A box was begun next by cutting four lengths of 3/4" Baltic Birch plywood to 3" X 3 1/2" on the table saw. These four lengths were glued face-to-face to make a 3" stack of plywood for further machining into the desired storage box. The plan is to cut the lid from this stack and machine out the interiors of box bottom and lid. A recess will also be cut into the outside of the lid as an assembly platform. (Ended up skipping this step.) Four brass pins glued into the corners of the bottom will fit into holes in the lid and hold the lid in place.
The glued up block was sanded on all four sides with the orbital sander using 100 grit paper. The block was then cut in two on the table saw approximately 1" from the top surface. The two new sides were sanded. The bottom block was clamped to the milling table with two strap clamps and marked for the 2" X 2" storage compartment. A 1/4" hole was drilled in one corner of the planned opening. A 3/8" end mill was used to rout out the opening to a depth of 5/8". The rounded corners were squared with a chisel, which was also used to clean up the sides. The small blocks needed to be raised for easy access, so a 1/2" X 3/8" X 2" block of wood was prepared and glued into the front side of the opening.
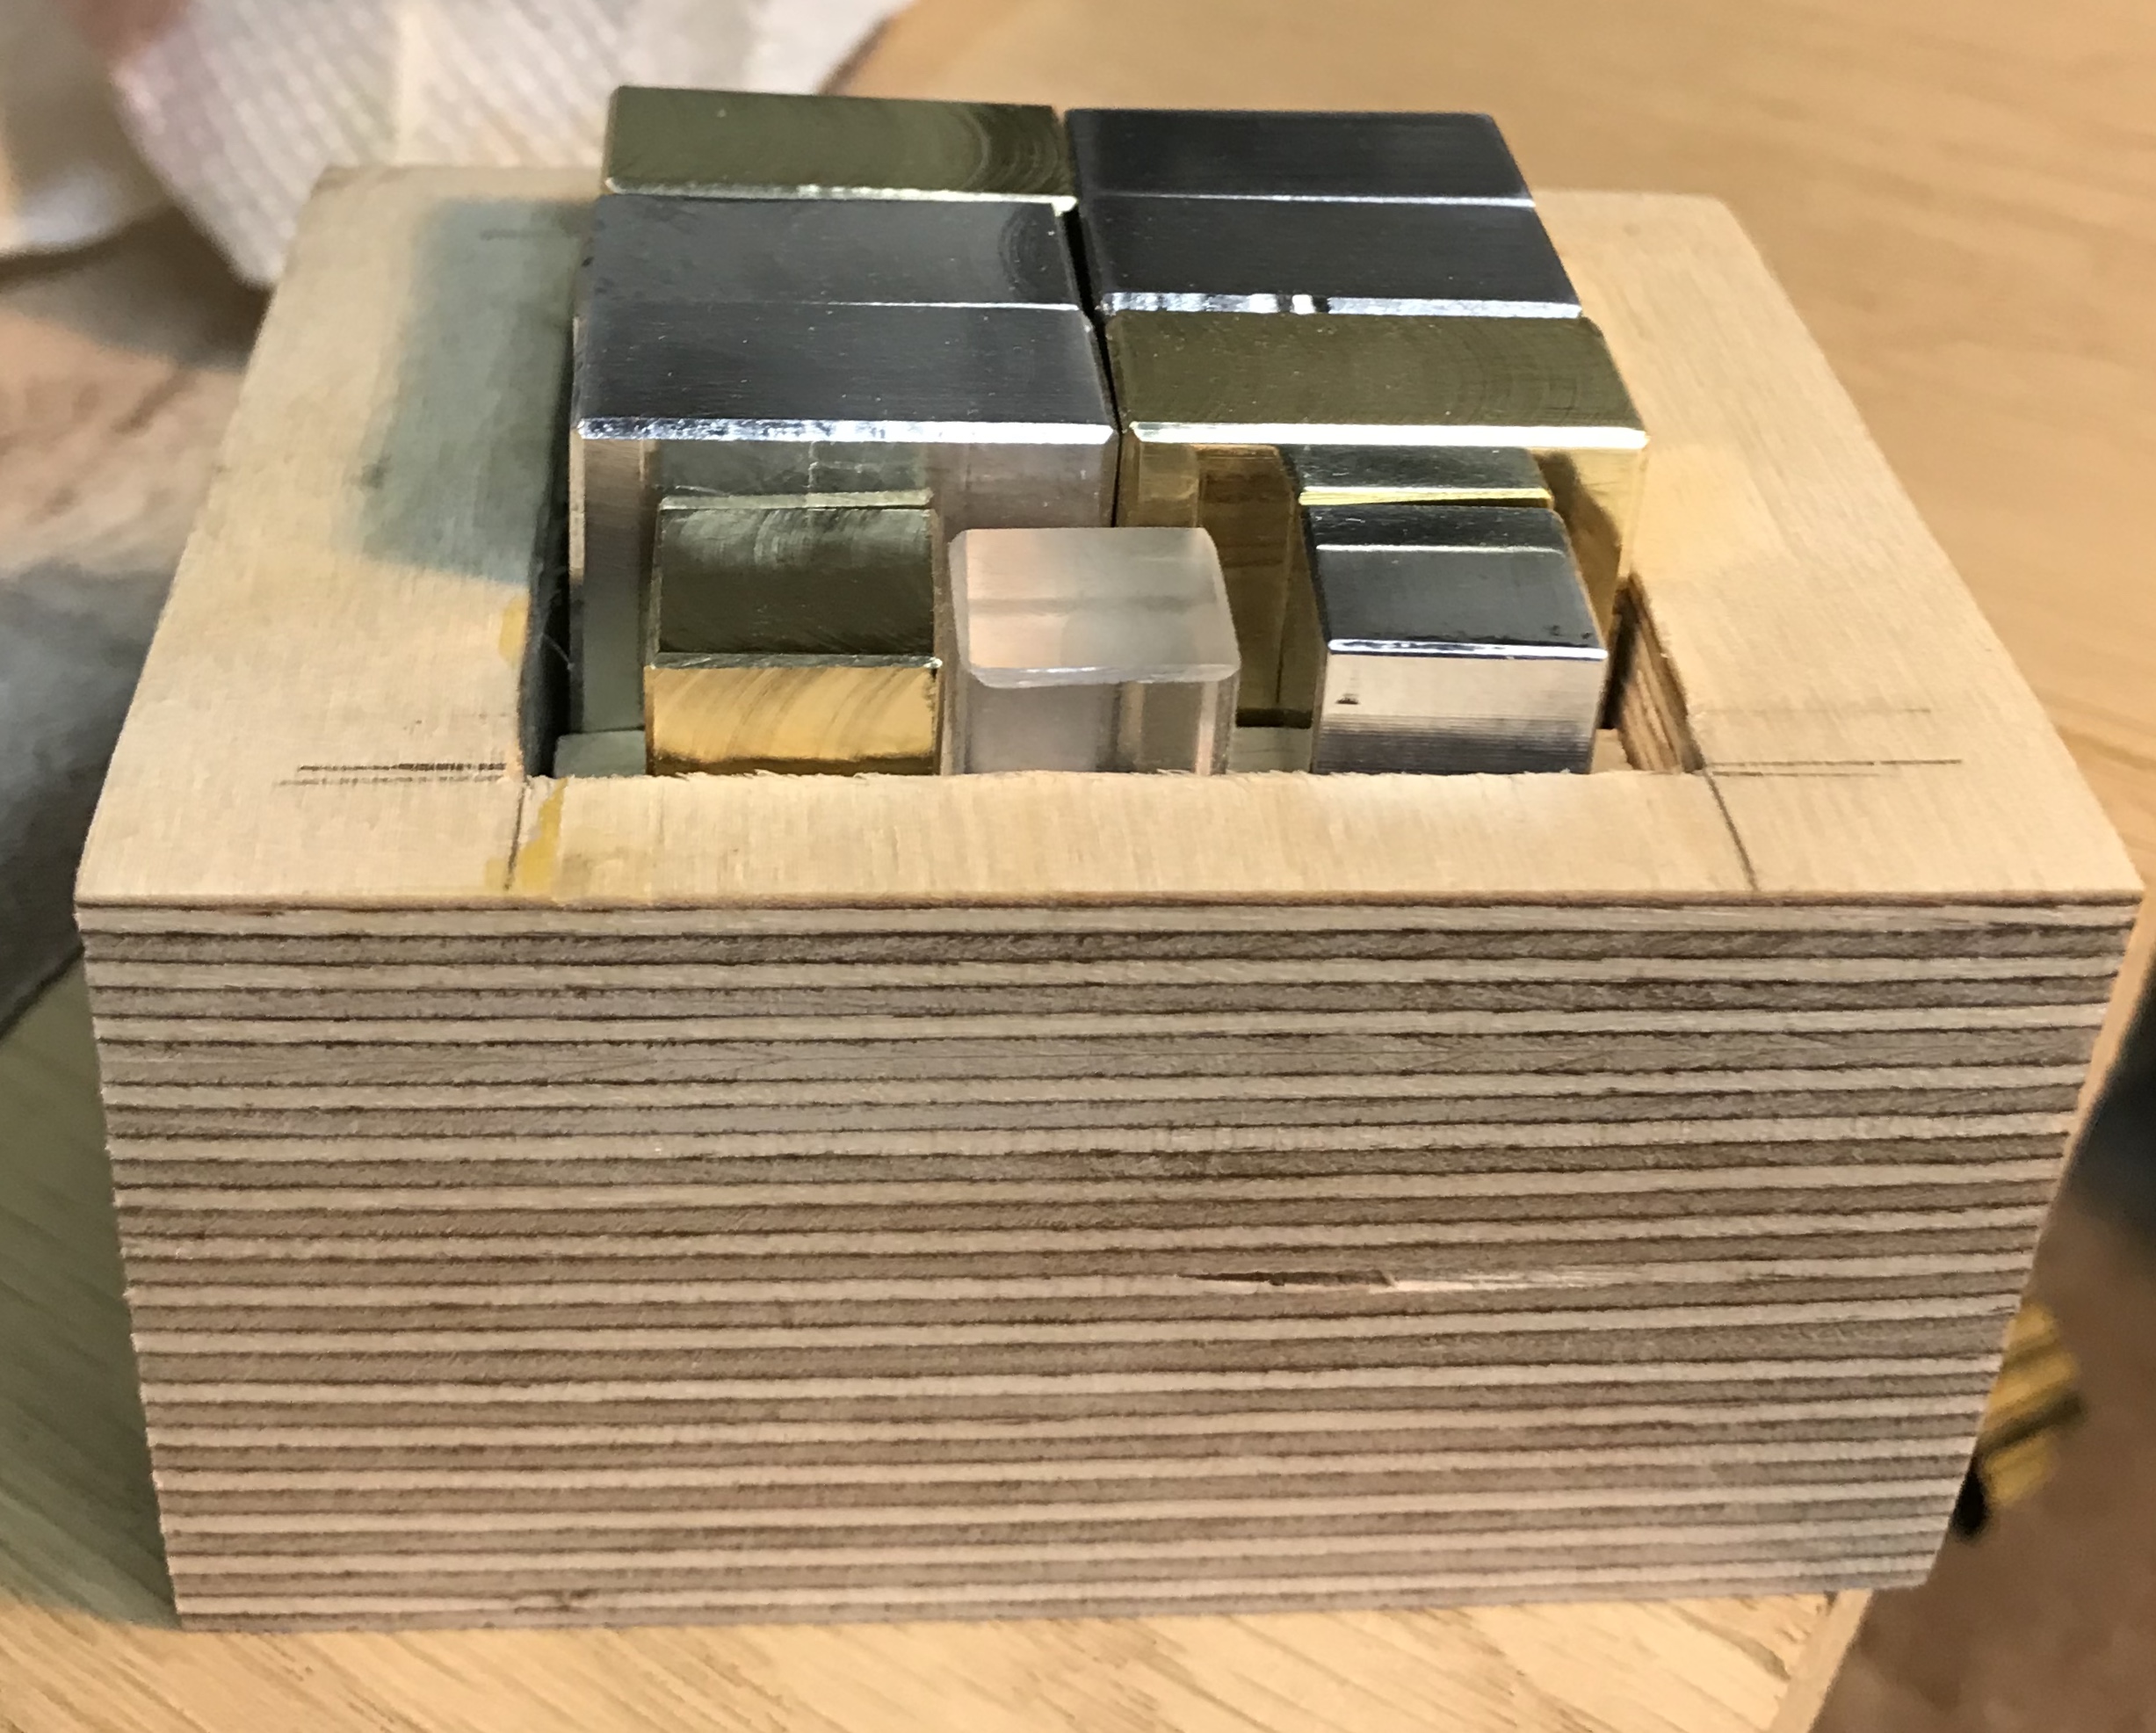
The fronts of the top and bottom were marked and the thicknesses of the walls on the bottom were measured. These measurements were transferred to the top and a 3/8" deep pocket was cut into the underside of the top. Again the sides and corners were cleaned up with a chisel providing a nice fit with the puzzle pieces in place. All sides of the top and bottom were sanded with 220 grit paper.
The attaching mechanism is four pins set in the corners of the bottom that fit in corresponding holes in the top. One corner of the bottom was marked 1/4" in from each side. Two stops (an angle plate and a positioning bar) were set at right angles on the milling table. The box was held against the stops and a drill bit was centered over the marked point. The hole was started and then drilled with a 0.120 drill to a depth of 1/4". This was repeated at each of the other three corners. The top's four corners were drilled similarly, except a 1/8" drill was used. A 1/8" brass rod will be forced into the bottom holes and needs to be an easy fit in the top holes. So these holes need to opened a bit.
The brass rods (1/8" X 1/2") were made by facing a long rod, chamfering, and sanding before using a hacksaw to cut off the part at 1/2". The cut end was faced and chamfered. This process was repeated three more times. The rods were then hammered into the holes in the box bottom. The top's holes were opened with a 0.128" drill. The top holes were further opened with a #27 drill and one corner was a little misaligned and it was opened to 0.173". This gave a reasonably snug fit between lid and bottom.
Decided to finish the outside with shellac. Each coat was followed by at least one hour of drying time and a light sanding with 220 grit paper. After four coats the puzzle box looked very nice. Added a coat of paste wax. The unwaxed puzzle and box is shown below.